Table Of Content

That's partly because they serve so many different functions, all of which look different, and all of which can be effective. The accessory sent the design world into quite the tizzy—but it also boasts deep roots in surrealism. This comprehensive guide is designed to accompany you throughout your journey, offering a blend of practical techniques, insightful tips, and step-by-step instructions. Regardless of your current skill set or experience level, this guide aims to inspire you to push your creative boundaries and craft stunning, lifelike braid illustrations. Alternatively, Shiela Larson, a distinguished artist, offers an exceptional approach of utilizing an alternating ‘Z’ shape as the baseline for her braid illustrations.
Detailed Graphite Hair Drawings by Hong Chun Zhang — Colossal - Colossal
Detailed Graphite Hair Drawings by Hong Chun Zhang — Colossal.
Posted: Wed, 23 Aug 2017 07:00:00 GMT [source]
Learn how to draw different kinds of hair in this step-by-step tutorial.
Hairstyles - Drawings of Hairstyles by Emmy Kalia - Cosmopolitan
Hairstyles - Drawings of Hairstyles by Emmy Kalia.
Posted: Wed, 23 Nov 2016 08:00:00 GMT [source]
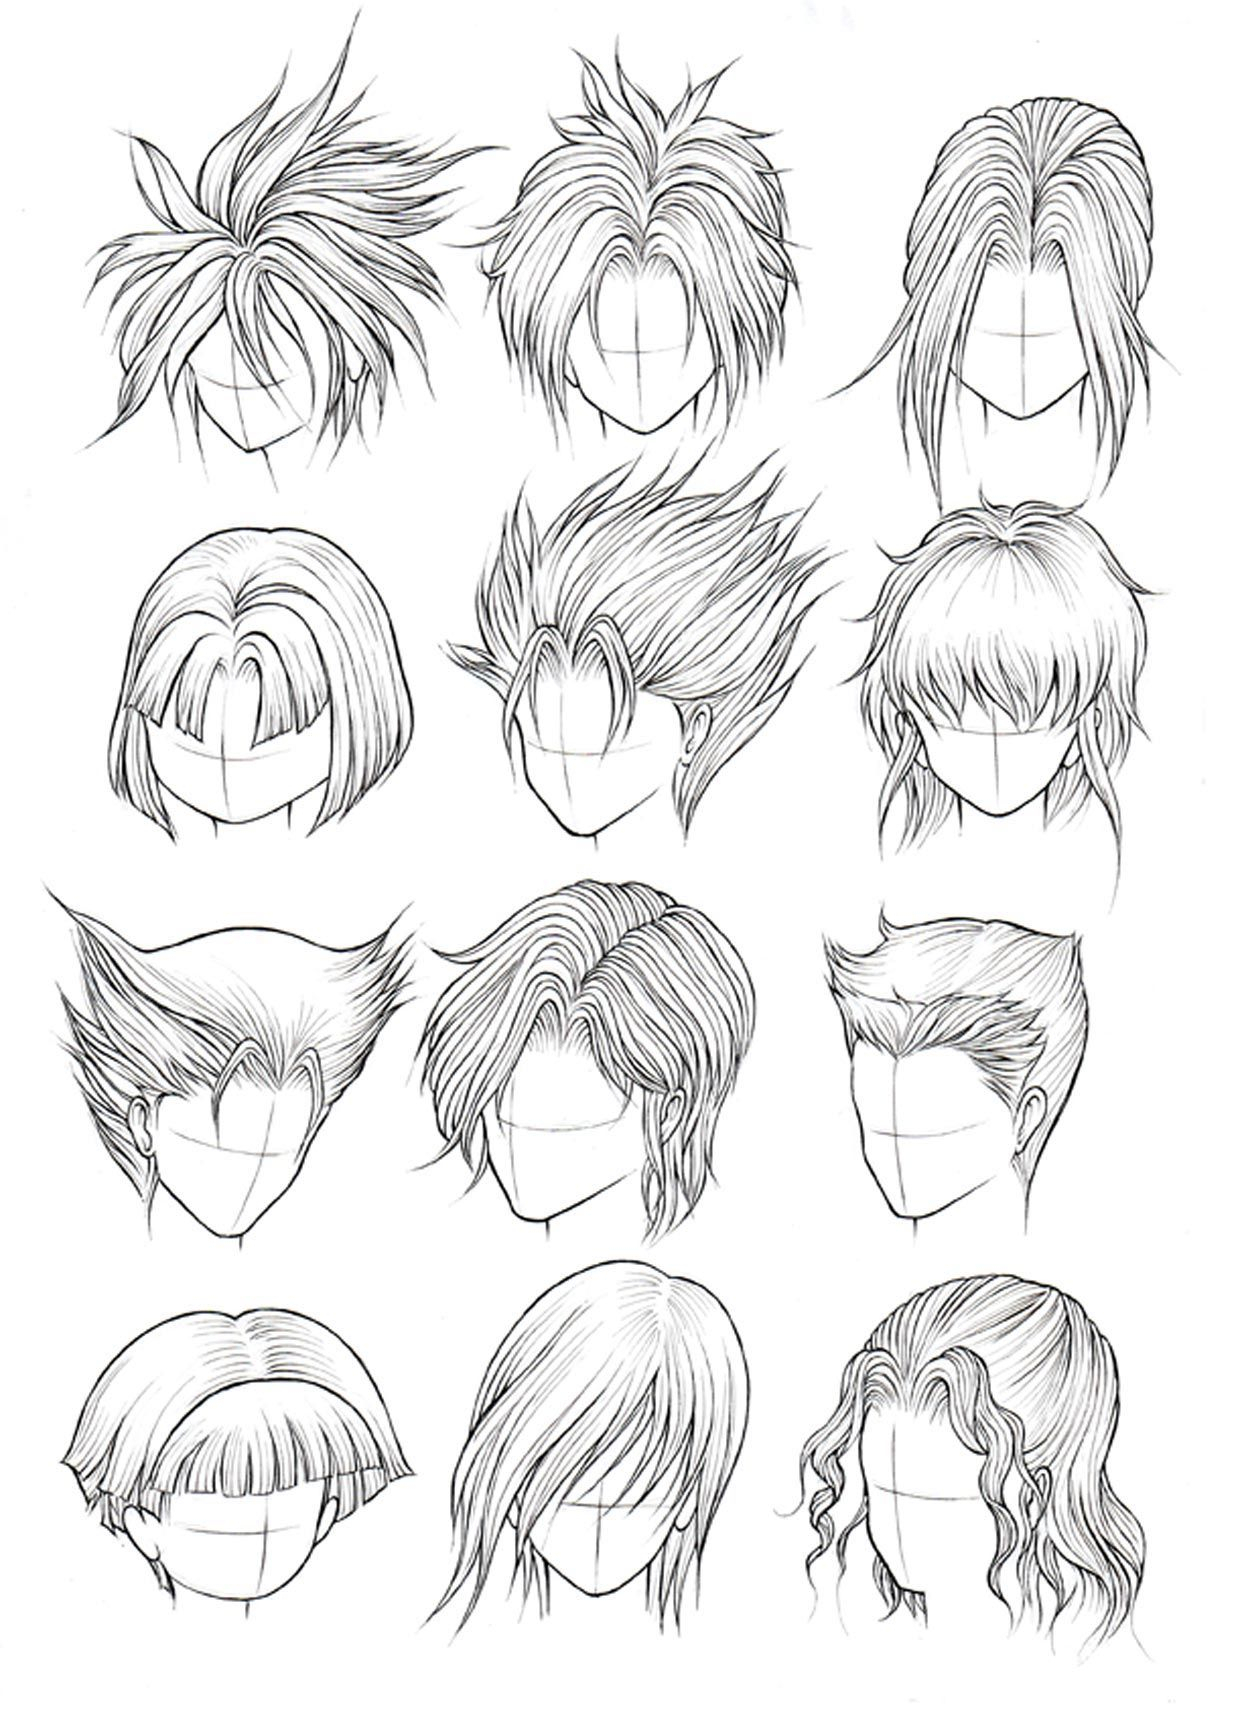
Although unlike the previous example you can make them slightly less apparent to give the hair a smoother and neater look. Consider the direction and flow of the hair strands, and add subtle curves or arcs to convey a sense of motion. This will make your drawings appear more lively and engaging. Analyze the unique characteristics of each style, such as the partings, braids, updos, or ponytails, and practice replicating them in your drawings. Now that you have the basic structure, strands, and volume, it’s time to refine the details.
Step 3
Since this is a short hairstyle, keep them closer to the shape of the head, adding just slightly more volume to the outline of the skull. To portray thick or voluminous hair, use broad strokes to create a sense of fullness. Include individual hairs curling away from the main braid for a natural look, especially if the hair isn’t naturally straight or styled. After outlining the base structure of your braid by superimposing the primary shapes onto the ‘line of action’, your next move is to delve into the intricacies.
Mastering the Art: How to Put Hair in a Clip Like a Pro
Pay attention to smaller elements like flyaway hairs, wisps, and stray strands to add a sense of realism. One of the crucial aspects of drawing hair is observing and understanding different hair types and textures. Hair can vary greatly, ranging from straight to wavy, curly, or even afro-textured.
Learn Art Online
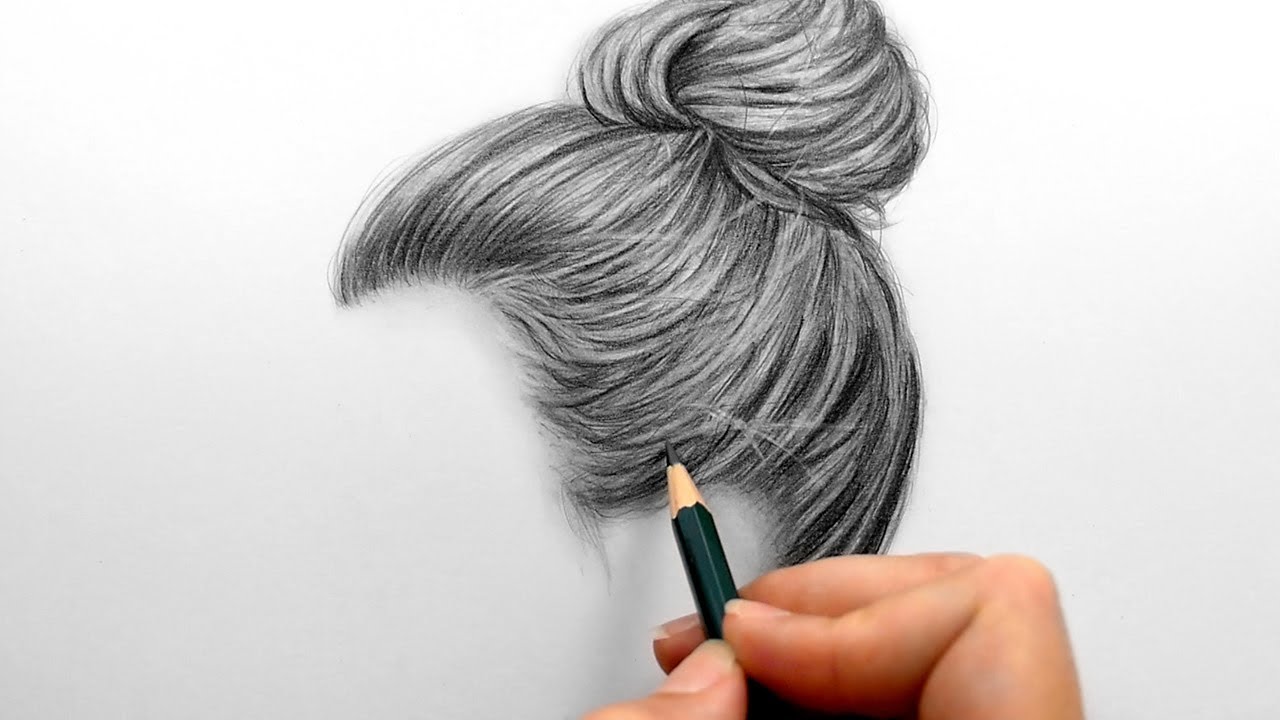
I am going to use the value scale to define details and give a 3D effect to the hair shapes. • The volume varies depending on the amount of hair on each side of the head (3). Draw a line from the hairline to the back of the head to create the hair part (this can be center or to the side somewhere). Using the same rolling shapes as before, fill out the rest of the hair until you reach the back of the head.
Shade the whole haircut now, drawing curls all around. Afro-textured hair has a lot of curly strands and texture. Gently outline the hair without drawing lines that are too thick.
• My first step was to draw the outline of the main lock (the one which will be the base of our drawing), following the direction in a S shape. Hair is a very important point of expression for our characters, so drawing hair exactly as we imagine it can be a real challenge. I try to break it down and think three-dimensionally and consider the volume and shape of the hair form with drawing hair. The one I mentioned in the episode, from the romantic drama Love & Basketball, is sexy, yes.
So, using the pen of your choice, trace over the graphite marks. If you want line variation then use a couple of technical pens with different-sized nibs or a brush pen. Afterward, add depth to the hair by adding numerous lines to each lock of hair. At last, it is time to go over the illustration in ink.
For example,about halfway down the hair on the left, light illuminates all threesections of hair. Notice that while theyall look ribbon-like, they are not repetitive and each has a uniqueshape and curve of its own. Divide this hairstyle into several curly locks of hair by drawing the same bouncy line as before as many times as needed. Afterward, it is time to fill in the hair with more texture, so add long and short lines throughout the hairstyle.
As we develop the value range and create the illusion of form, we'll also consider the texture. If we keep these things in mind, then we can assume that (in most cases) the parts of the hair and the areas around the face will be darker in value since these areas recede. We also know that highlights are most likely to be found on the top of the head, closest to a light source above. We must consider the values and tones that are observed within the hair and include them in our drawing in order to communicate the volume of the hair.
Afterward, fill in the shapes of the hair with varying lines to give it texture, volume, and depth. Starting a little above the hairline (or forehead), draw large petal-like shapes to create the bangs. Once you’re comfortable with the basics, try experimenting with other braid styles, such as fishtail or French braids. Keep practicing your shapes and shading for more natural results over time. In addition, one feature that is often overlooked, yet plays a crucial role in completing the braid drawing, is the end of the braid. “Visualize a tiny band clenching the hair ends together, causing a gentle compression at that point.
Click the link at the bottom of this photo to see the full tutorial. Blonds have locations of darker tone in their hair, and people that have black hair have areas that are almost white (highlights). Add strands of hair in the form of little springs all around the head.
You can use mine, or create your own in some other style. Iam keeping the darkest values and highest contrast around the face. As I continue drawing I look for "ribbons" of hair to indicate, usually with a highlight and halftone. Forexample, the light must look like it's coming from the same directionand have the same intensity or brightness throughout the drawing. On the other hand, straight hair has serene, calm, simple and maybe elegant lines.
The third and fourth steps are combined and are executed at the same time. Before we begin the process of drawing the hair, we need to be sure that the structure of the head is drawn in place. The structure of the head dictates the shape and flow of the hair and should be defined before we begin drawing the hair. Remember, every head of hair is unique, so your drawing techniques should vary to match the distinct characteristics of each hair type. For example, consider the texture, volume, color, and style differences when drawing braids on people of various ethnicities. Textured braids on a Black person, like cornrows or box braids, will differ from those on a person with smoother hair due to their unique styling and texture.


No comments:
Post a Comment